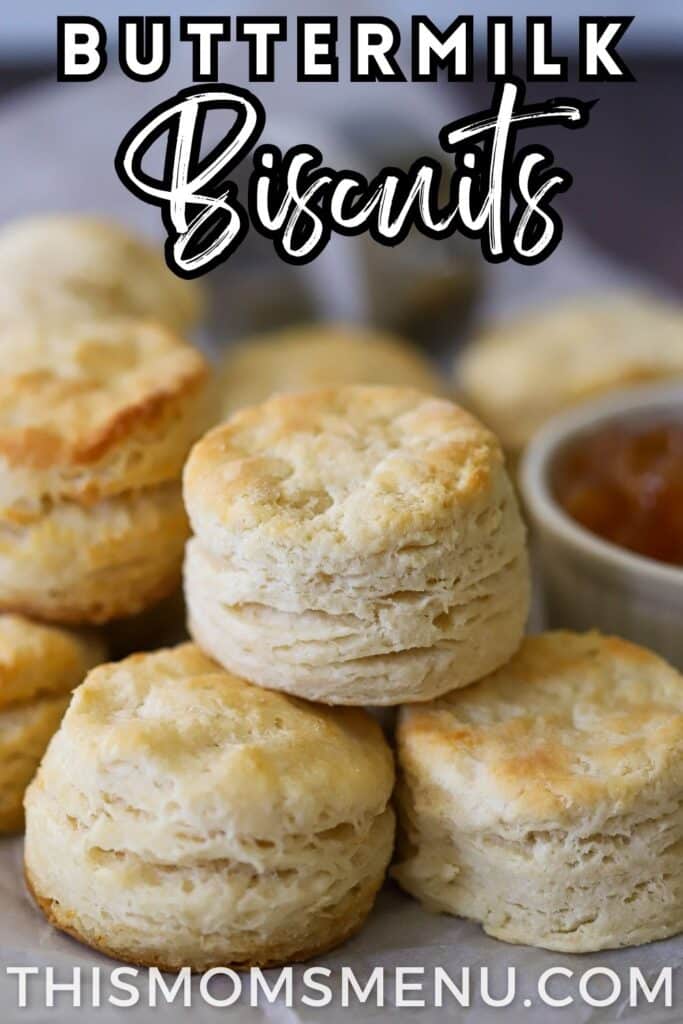
Light and flakey, these buttermilk biscuits will quickly become a staple breakfast item. With simple ingredients and a classic technique, these biscuits are also quick and easy to make.

This Mom's Menu is a participant in the Amazon Services LLC Associates Program, an affiliate advertising program designed to provide a means for sites to earn advertising fees by advertising and linking to amazon.com. This post may be sponsored or contain affiliate links but all opinions are my own. I may earn money from purchases made through the links shared here (at no additional cost to you)
Does it get any better than a good buttermilk biscuit? I sure don't think so. These old-fashioned biscuits are surprisingly easy to make with simple ingredients making them a great choice for any occasion.
If you make these biscuits, then be sure to check out my sausage gravy recipe for the ultimate duo! And for more classic breakfast recipes you can't beat my easy-made-from-scratch pancakes and for a full spread that uses these biscuits check out my article on how to put together a breakfast grazing board.
Jump to:
Ingredients and Substitutions
One of my favorite things about this biscuit recipe is that the ingredients are all things that your great-great-grandparents would easily recognize.

- Flour - I used a mixture of all-purpose flour and cake flour. Adding cake flour makes the biscuits more tender and fluffy while all-purpose flour ensures that there is still a nice flakey outer layer. You can replace the cake flour with additional all-purpose flour if you prefer. Read more about cake flour here.
- Salt
- Butter - I use salted butter. If you use unsalted, then you will need to add additional salt to the dough. While many biscuit recipes call for shortening, I prefer real butter's taste and texture. I have not tried this recipe with vegan butter substitutes (margarine) so I can't say what the result would be. If you try it please let me know 🙂
- Baking Powder
- Sugar - You can swap the sugar for honey or even molasses
- Buttermilk - Using buttermilk in biscuits produces a taller, fluffier biscuit and it adds a slightly tangy flavor. If you only have milk on hand then you can use it in place of buttermilk. You can also make your own buttermilk by adding 1 teaspoon of white vinegar or lemon juice to milk.
See the recipe card for quantities.
Equipment
Just like the ingredients, the equipment for this recipe is all things that have been commonplace in kitchens for decades. To make this recipe you will need:
- Large mixing bowl
- Wire whisk or fork
- Measuring cups and spoons
- Cheese grater - If you don't have a grater, you can use a pastry knife to cut the dough into the flour, but the texture of the biscuits won't be quite the same.
- Bench scraper, mezzaluna, or large knife
- Rubber spatula
- Biscuit cutter - I used a 3" biscuit cutter and got 12 biscuits with a little dough leftover. You can use any size cutter that you like (or even an upside-down cup) but it will alter the yield.
Before you get started ...
Make sure to preheat your oven before you begin to assemble the dough. It's also nice if you put your butter in the freezer but if you forget, or time doesn't allow then very cold butter will work as well.
Instructions
Most biscuit recipes have very similar ingredients. The thing that differentiates a good biscuit from a great one is all about the technique. Even though it might seem simple, just a few extra steps will make all the difference.
Before you begin be sure to preheat your oven.
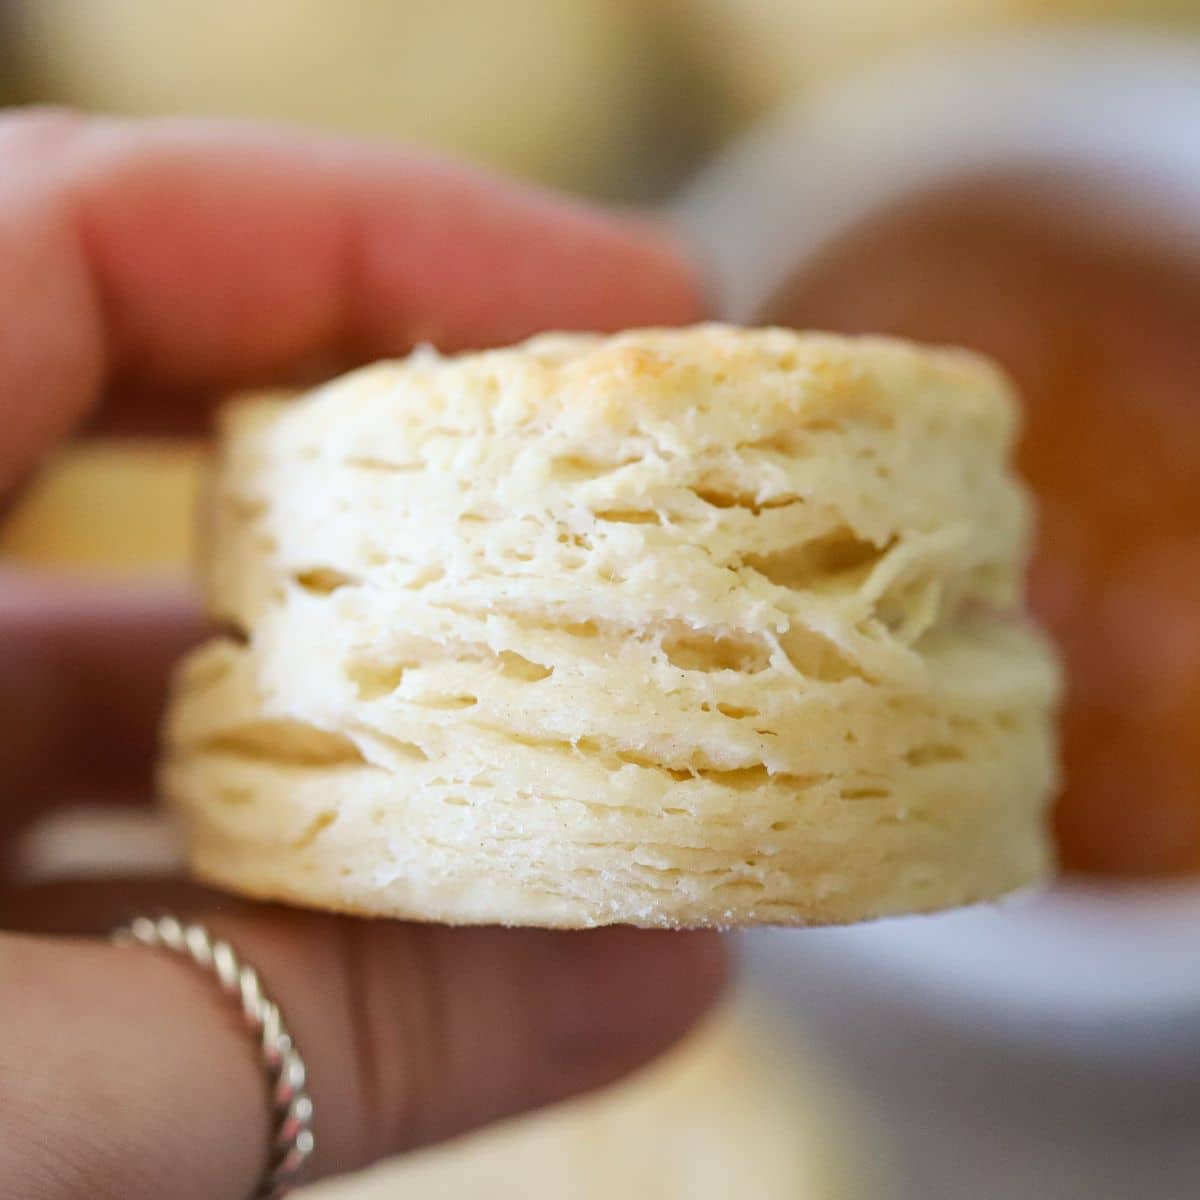
Tip: Using frozen or very cold butter keeps it from melting and prevents it from absorbing flour too soon in the dough-making process. When the butter stays intact until the biscuits are in the oven the end results are flakey pockets and a much higher rise. Read more about this here!

Whisk together the dry ingredients. Then, grate the frozen or cold butter into the bowl. Stop occasionally to gently toss the butter in the flour to prevent it from clumping. Gently mix the butter into the flour until all of the butter is coated in flour and evenly distributed in the bowl.

Next, Pour half of the buttermilk into the flour and butter. Use a rubber spatula to work the buttermilk into the flour. Add additional buttermilk a little at a time until there is no dry flour in the bowl.

Turn the dough out onto a well-floured surface. Press the dough out to about until it is about 1" thick. Cut the dough into fourths.

Stack each section of the dough. Then, press it down to 1" thickness again. Repeat the cutting, stacking, and pressing process at least 3 more times adding additional flour if the dough gets sticky.
Tip: The process of cutting, stacking, and pressing the dough is called 'booking' and it is what creates all the distinct flakey layers in a biscuit. While you can skip this step it only takes a couple of minutes and makes a big difference in the end result.

Flatten the dough to about one-half an inch thick. Then, using a biscuit cutter, press straight down into the dough without twisting to cut out the biscuits. Stack and flatten the remaining dough, then repeat the cutting-out process until you have used all of the dough.
Tip: Avoid twisting the biscuit cutter into the dough. This seals all those nice layers we created during the booking process and limits how high the biscuits will rise.

If desired pour 3 tablespoons of melted butter into the bottom of a large cast iron skillet. Place the cutout biscuits in the skillet and then bake them for about 15 minutes or until they are golden brown and cooked through.
Variations
Here are some of my favorite ways to change up this recipe:
- Cheddar Biscuits - Add about 1 cup of shredded cheddar cheese to the dough in step 1 then follow the remaining recipe as written. For an extra touch, brush melted garlic butter over the biscuits after baking.
- Honey Butter Biscuits - Replace the sugar in the recipe with honey. Then, after baking brush the biscuits with honey butter made from equal parts melted butter and honey.
- Freezer Biscuits - Enjoy fresh biscuits anytime you want. After cutting out the biscuits, place them in a single layer on a parchment-lined baking sheet in the freezer. Once they are frozen transfer them to a freezer bag. When you're ready to enjoy them, simply bake according to the recipe instructions adding 4-5 additional minutes to the baking time.
Be sure to check out this recipe for low-carb biscuits!
Storage
Biscuits are best enjoyed fresh. If your eyes are bigger than your stomach and you wind up with too many biscuits you can store leftovers in a sealed container in the fridge or at room temperature. You can also freeze the cooked biscuits for up to six months.
Check out the variations section of this post for instructions for freezing the biscuit dough before baking.
FAQs
While many biscuit recipes call for shortening (or Crisco), I prefer real butter's taste and texture. I have not tried this recipe with vegan butter substitutes (margarine) so I can't say what the result would be. If you try it please let me know 🙂
There are several things that all come together to give you super fluffy biscuits. These are all explained in the instructions section of this post, but here is the short of it:
1. Using frozen, grated butter
2. Making biscuits with buttermilk
3. Booking the dough
4. Using a blend of all-purpose and cake flour
5. Bonus tip - for SUPER tall and fluffy biscuits, allow the biscuits to slightly touch each other when you place them on the baking sheet.
If your biscuits are crumbly or fall apart then your dough was likely a little too dry or your butter wasn't cold enough. The dough should be just dry enough to no longer be sticky. When you cut the dough the exposed, raw edges should be slightly tacky.
Biscuits are very versatile. They can take the place of a dinner roll with many Southern meals such as fried chicken, or made into a sandwich with leftover holiday ham. They are great served along with breakfast meats, and eggs, topped with sausage gravy, or simply smeared with honey or jam.
📖 Recipe

Old Fashioned Buttermilk Biscuits
Equipment
- Cheese Grater
- Mixing Bowl
- Biscuit Cutter
- Cast Iron Skillet or baking sheet
Ingredients
- 1 ½ cups All-Purpose Flour
- ½ cup Cake Flour
- 2 tablespoon Baking Powder
- 1 teaspoon Sugar
- ¾ teaspoon Salt
- ½ cup Butter cold or frozen
- 1 cup Buttermilk very cold
- 3 tablespoon Butter melted. optional, for cooking the biscuits
Instructions
- Preheat the oven to 425℉. In a large mixing bowl, whisk together the all-purpose flour, cake flour, baking powder, sugar, and salt.1 ½ cups All-Purpose Flour, ½ cup Cake Flour, 2 tablespoon Baking Powder, 1 teaspoon Sugar, ¾ teaspoon Salt
- Grate the butter into the flour mixture, gently stirring intermittently to prevent the butter from clumping together. Once all the butter is grated in, gently mix until all of the butter is coated in flour. This should only take a few seconds.½ cup Butter
- Pour half of the buttermilk in with the butter and flour. Use a rubber spatula to quickly work the liquid into the flour. Add more buttermilk as needed until you have a dough that stays together when pressed. Work as quickly as possible to keep the butter cold.1 cup Buttermilk
- Turn the dough out onto a well-floured surface. Using floured hands, press the dough straight down to flatten it to about 1 inch thick. Cut the dough into fourths and place the pieces into a stack. Smash the dough straight down again and repeat this process at least 3 times adding additional flour if the dough becomes too sticky.
- Press the dough to about ½ inch thickness. Use a biscuit cutter to cut out the biscuits. Ensure that you press straight down with the biscuit cutter, and don't twist it in the dough. Stack any remaining dough pieces up and re-flatten and cut them continuing this process until all of the dough is used up.
- If desired, pour 3 tablespoons of melted butter into a large cast iron skillet. Then evenly place the cut biscuits in the skillet. It's fine if they touch. Note: if you don't have a cast iron skillet or prefer not to use one, you can bake the biscuits on a lightly greased sheet pan.3 tablespoon Butter
- Bake the biscuits in the preheated oven for 15-17 minutes or until they are golden brown and cooked through.
Be sure to read the entire post for tips, tricks, and help troubleshooting.
The nutrition information listed here is only an estimate and is simply provided as a courtesy. It nor any other information within this post should constitute medical or nutritional advice. Be sure to read all packaging and ingredient labels for potential allergens. Optional ingredients are not included unless otherwise specified.
Nutrition
Pin It


Tina Noggle says
I have been trying different biscuit recipes for about a month. I have never been able to master my great granny‘s biscuits. These biscuits are awesome! Make this recipe one time and you will never go back to your old recipe!!!! Thank you, thank you!!!!