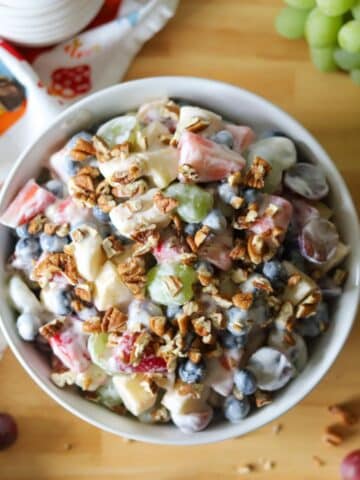
This recipe for keto yogurt is a twist on the Australian-style Noosa Yogurt. It is a deliciously creamy treat that is easy to make using an instant pot. You can eat it plain, or try one of the four flavors included in the recipe.
This Mom's Menu is a participant in the Amazon Services LLC Associates Program, an affiliate advertising program designed to provide a means for sites to earn advertising fees by advertising and linking to amazon.com. This post may be sponsored or contain affiliate links but all opinions are my own. I may earn money from purchases made through the links shared here (at no additional cost to you)
You are in for a real treat with this low-carb yogurt recipe. You won't believe how creamy the yogurt turns out or how easy it is to make using an instant pot.
Jump to:
Ingredients and substitutions
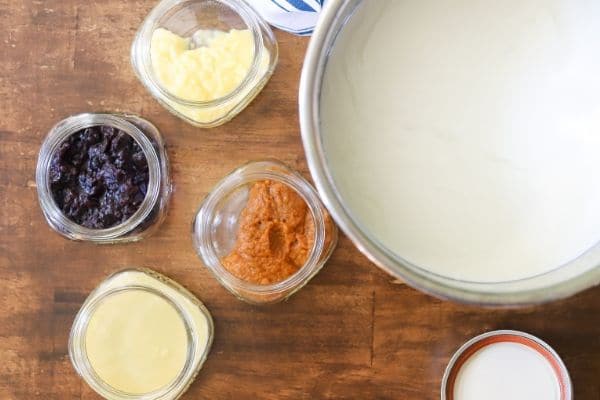
These are the ingredients for the yogurt base. Be sure to check out the recipe card for some of my favorite flavor options!

- Ultra Filtered Whole Milk
- Unsweetened Plain Yogurt or 4 probiotic capsules (affiliate). If you use the capsules, open them up and only use the contents.
- Liquid Stevia - You can use any sweetener that you like, or if you prefer you can also leave your yogurt unsweetened
- Vanilla Extract or vanilla bean extract
Choosing the right milk
One sure way to decrease the carbs in the final product is to start with low-carb milk. You will want to look for ultra-filtered whole milk.
These kinds of milk are run through multiple filters which remove much of the sugar while at the same time concentrating the protein and calcium content.
I recommend the brands Fairlife or Organic Valley. Both of these kinds of milk are widely available and have half of the carbohydrate content compared to regular milk.
How to make low carb yogurt in the instant pot
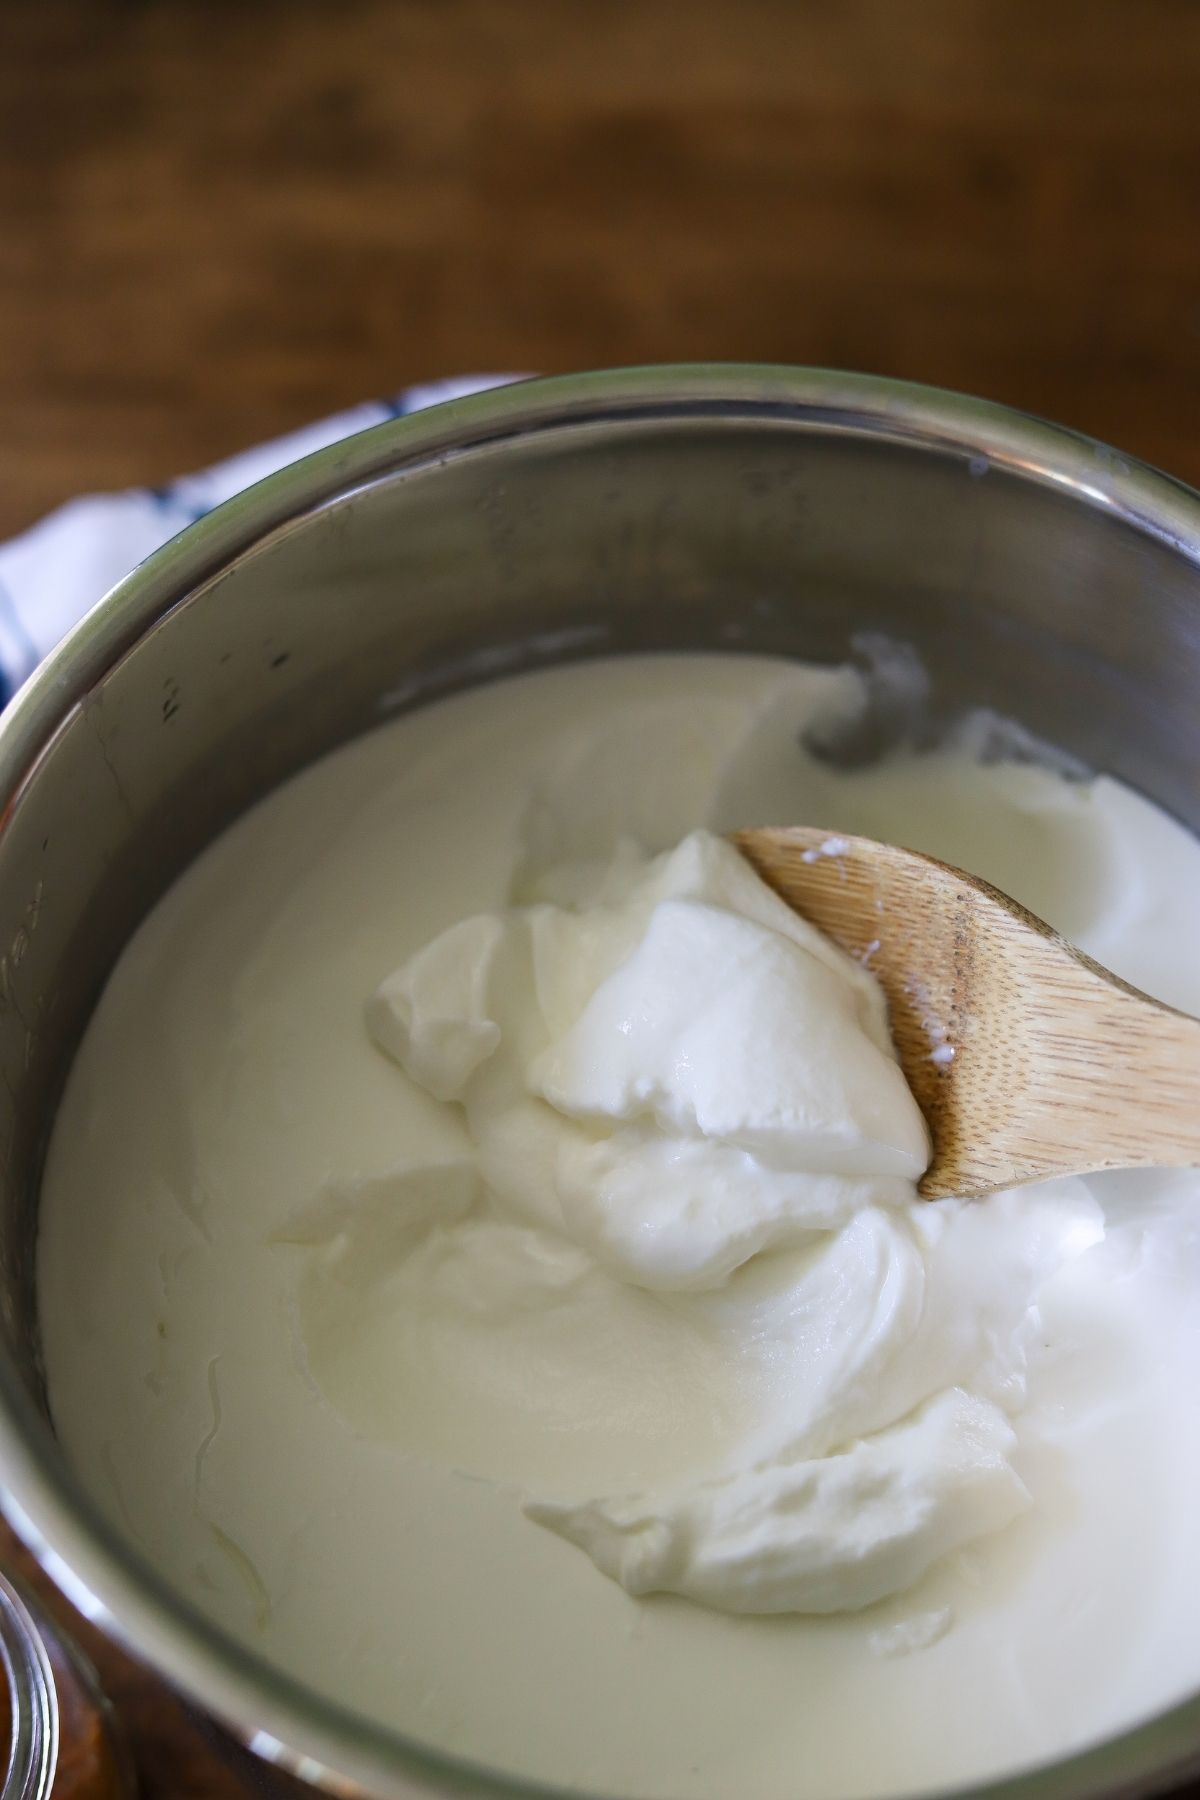
Making yogurt can seem very intimidating, but you will be surprised at just how easy it is! You will start out by stirring together the milk and plain yogurt in the liner of an instant pot.

Next, you will cover up the instant pot with the standard lid or a glass lid. If you are using the regular instant pot lid, do not lock it. Since yogurt isn't made under pressure the lock does not need to be locked.
Press the "Yogurt" button. Your instant pot should default to 8:00, but if not use the + or - button to set the time to 8:00. The instant pot will get the milk to the correct temperature and maintain it for 8 hours.
When the time is up, remove the inner liner from the instant pot, cover with plastic wrap and refrigerate for 8 hours.
Tip: Once the cooking time is up the instant pot will no longer maintain the temperature so you want to be sure to get it into the fridge pretty soon after the time is up otherwise it may spoil.
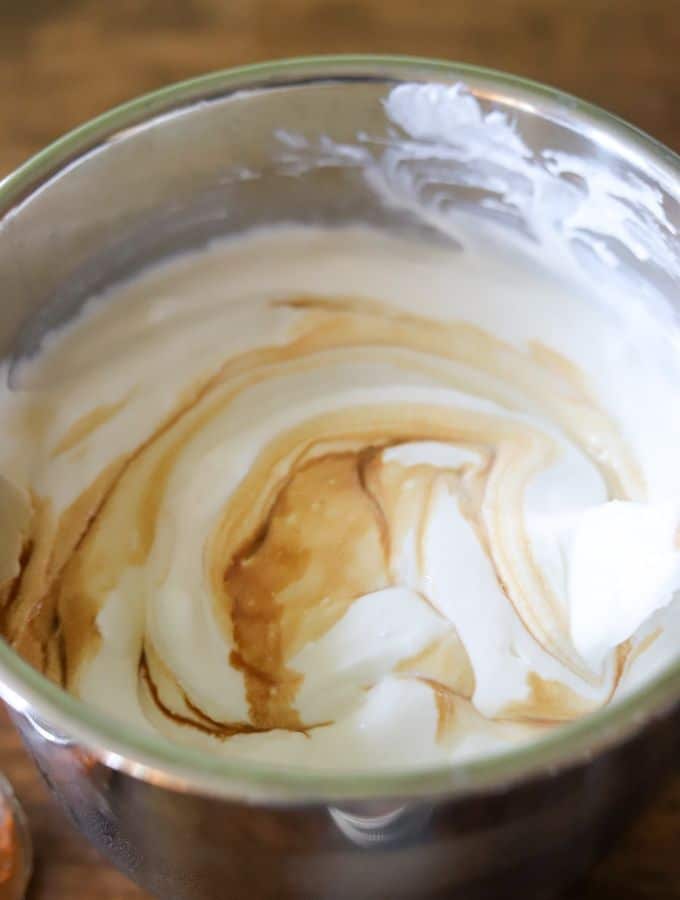
After it has been in the fridge for at least 8 hours, stir the liquid stevia and vanilla into the yogurt. At this point, the yogurt is ready to eat. Transfer the yogurt to a clean container with a tight-fitting lid and store for up to 14 days.
Variations
Here are a few easy ways to change up this recipe:
- Vegan - Use unsweetened full-fat canned coconut milk in place of the ultrafiltered milk and replace the plain greek yogurt with 4 vegan friendly probiotic capsules (affiliate). In step one, combine the coconut milk, then open up the capsules and combine the contents with the coconut milk. From here follow the recipe as it is written.
- Make it in a crockpot - Check out this crockpot yogurt recipe for instructions for cooking in a slow cooker!
- Make low carb Greek yogurt - If you prefer a thicker yogurt, simply follow steps 1-8 in the recipe card. Before adding the stevia or vanilla, you will strain the yogurt. To do this line a fine sieve with a few layers of cheesecloth or a coffee filter. Place the sieve over a bowl and spoon yogurt into the sieve. Refrigerate and allow the liquid to drain off for two hours. If you frequently make yogurt you may also want to invest in a yogurt strainer (affiliate).
Equipment
Having the proper equipment is crucial for making homemade yogurt. Luckily there isn't too much that you need to have. To make this recipe you will need the following:
- An instant pot with at least a 6 quart capacity
- Measuring Spoons
- a whisk
- Plastic wrap or bee's wax wrap (affiliate) (make sure you have a piece large enough to fully cover the top of the instant pot).
- Container with tight fitting lid for storing yogurt. See the section on storing homemade yogurt for some of my favortite containers!
How to flavor keto yogurt
Plain yogurt is quite tart, not very sweet, and has a flavor similar to sour cream. While some people enjoy the taste of plain yogurt, it can be unpalatable to those who are just beginning to cut sugar from their diets.
I recommend sweetening the yogurt with liquid stevia and a bit of vanilla extract. Liquid stevia stays smooth and doesn't get grainy the way that other keto-friendly sweeteners can which makes it ideal for sweetening yogurt.
I typically use about 1 teaspoon of each of the stevia and vanilla, which is just enough to take the edge off. I recommend starting there and then adjusting to taste.
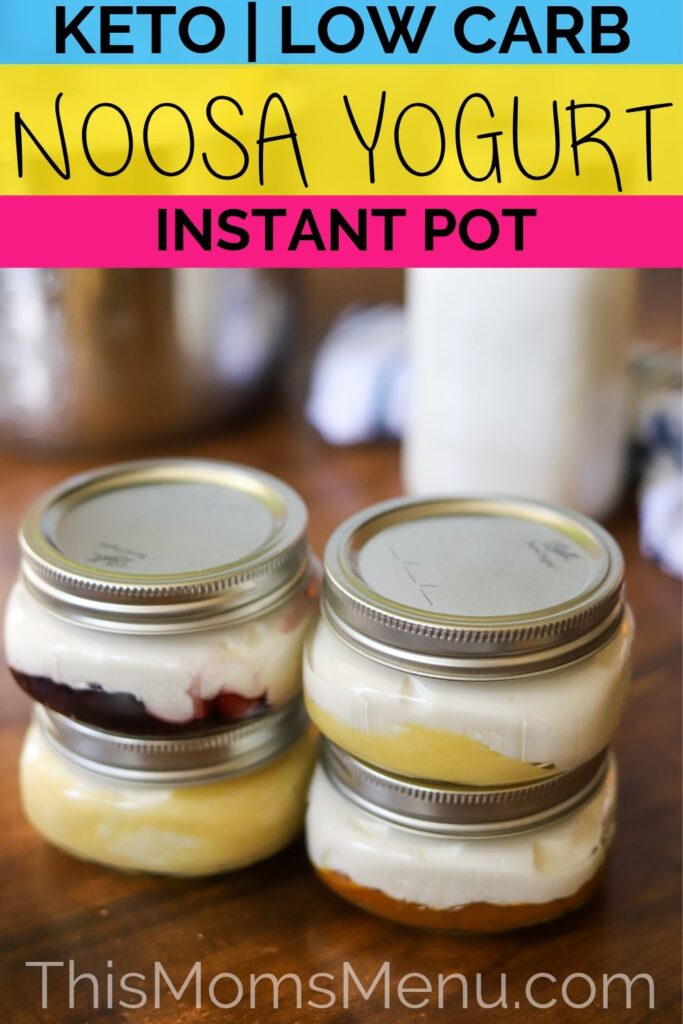
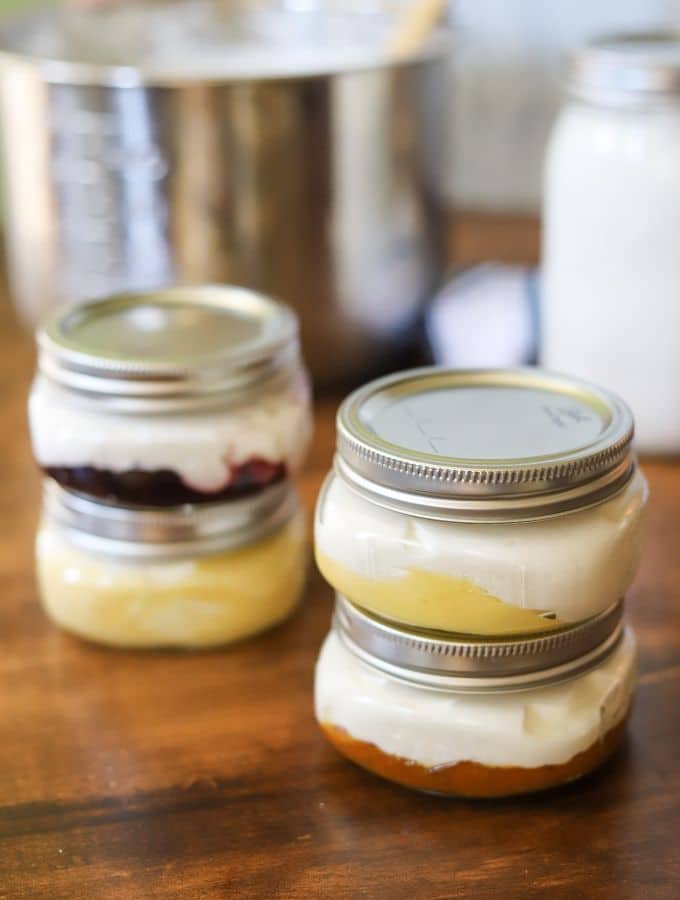
You can stop there and enjoy the mildly sweet yogurt as is, but if you've ever enjoyed a Noosa yogurt, you know that the flavors on the bottom of the cup are really what makes them so dang good.
I've included instructions to make my four favorite flavors, but don't let them limit you. Feel free to try out other flavor combinations and let me know how it goes!
Lemon Yogurt
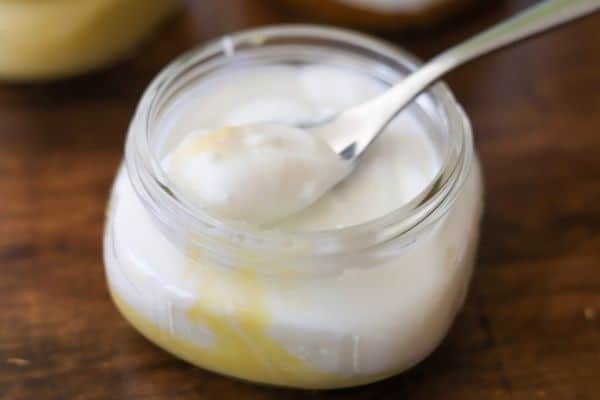
This lemon yogurt is my absolute favorite flavor and in my opinion, it's the most like the original. Simply make a batch of my super easy keto lemon curd and serve a few tablespoons with the yogurt and prepare to be amazed!
Blueberry yogurt
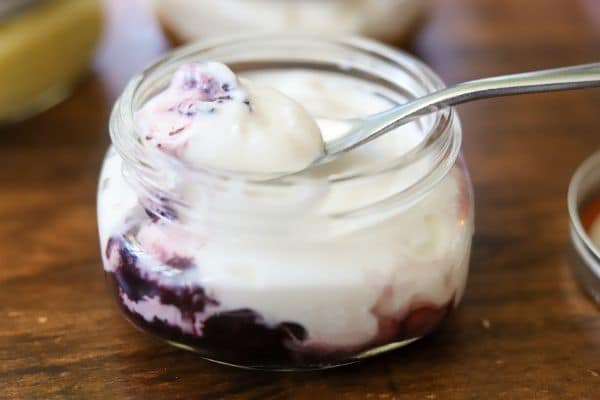
Blueberry is unanimously the favorite flavor of all four of my kids. Luckily it is really easy to make! Just combine 1 cup of fresh or frozen blueberries in a saucepan with 1 tablespoon of lemon juice.
Simmer this mixture on medium heat until the berries have softened and released their juices. You can smash the berries or leave them whole depending upon your preference. I don't find it necessary to sweeten the berries, but feel free to add some liquid stevia if desired.
Coconut yogurt

I'll be the first to admit that this coconut flavor isn't quite the same as the Noosa coconut yogurt. But it is delicious in its own right.
For this flavor use my recipe for keto coconut curd and add a few tablespoons to each serving of the yogurt. Coconut curd is halfway between a coconut jam and a coconut custard. It is absolutely divine and you won't regret making it if you are a coconut fan.
Pumpkin yogurt
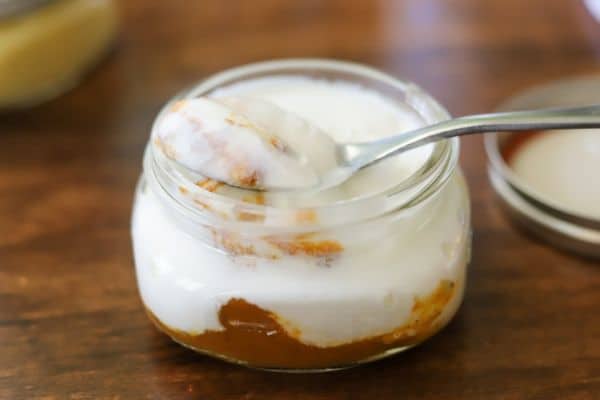
A fall flavor essential, this pumpkin flavor will have you busting out the flannel and Ugg boots before you get to the bottom!
For this flavor, you'll make a simple mixture with pumpkin puree, pumpkin pie spice, maple syrup, and cream cheese. The cream cheese just helps to smooth out the pumpkin puree but isn't really a noticeable flavor.
How to store homemade yogurt
Homemade yogurt can be stored in the fridge for up to 14 days. I like to use a large glass lock container (affiliate) or a large, wide-mouth mason jar (affiliate) to store the majority of the yogurt before adding any of the flavors.
When I am ready to add the flavoring, I love these half-pint, wide-mouth mason jars from Ball (affiliate). They are the perfect shape for fruit on the bottom yogurt, and they even remind me of the original Noosa container.

FAQs and Troubleshooting
All yogurt is essentially fermented milk with added cultures. For this reason, yogurt is a great probiotic and can help to improve your gut's microbiome. With more and more research pointing to the importance of gut bacteria, Yogurt is becoming one of the top-selling superfoods.
Whey is a byproduct of making yogurt and it occurs to some extent in all dairy yogurt-making processes. In traditional yogurt, the liquid whey is mixed back into the cultured yogurt to form a thinner consistency. Traditional yogurt can be made with skim, 2%, or whole milk.
Greek yogurt can also be made with many varieties of milk. But unlike traditional yogurt, all of the whey and excess liquid is strained off. This not only makes the yogurt super thick but also increases the protein content.
Whole milk is the only variety used for Australian-style yogurt. This is what gives the yogurt its classic velvety consistency. Australian yogurt is not strained, but due to the use of whole milk, it has a thicker texture compared to traditional yogurt, and a slightly thinner texture compared to Greek yogurt.
Australian yogurt is traditionally sweetened with honey but for the purpose of keeping this recipe keto-friendly, the honey was omitted. If you aren't watching your carbs or sugar intake, honey can be added in place of stevia.
In short, the answer is yes! Actually, just about anything is keto-friendly in the right portions.
The long answer is a bit more complicated because it can be tricky to calculate carbs in fermented products. Through the fermentation process, the bacteria consume almost all of the carbohydrates.
With that in mind, the actual carbohydrate content in this yogurt is likely less than what is listed on the nutrition label. Just to be safe, I prefer to overestimate.
You can check out this article all about eating yogurt on a low-carb diet for more info on this topic.
There can be a few reasons why homemade yogurt didn't thicken. Most likely it is related to the starter (the plain yogurt or probiotics) that are added at the beginning. If it thickened some and doesn't smell spoiled, then you can likely follow the directions for straining yogurt to get the consistency that you want. If it is a pourable consistency, then I suggest checking out this post for troubleshooting.
While yogurt that turns out grainy is usually safe to eat (make sure it doesn't smell spoiled), the texture is definitely a bit off-putting.
The likely culprit for grainy yogurt is one of two problems. Either you used too much starter (the plain yogurt added in the beginning), or your starter had additives. Try to avoid using a yogurt starter with inulin, pectin, or corn starch. Stonyfield organic is a good option that does not currently contain any of these additives.
Also, it's worth noting that occasionally yogurt appears grainy, but doesn't feel grainy when you taste it. If you find this to be the case, then try blending it with an immersion blender to make it smoother.
📖 Recipe

Keto Yogurt | Noosa Copycat
Equipment
- Instant pot
- Measuring Cups and Spoons
- Plastic Wrap
- wire whisk
Ingredients
- 54 oz Ultra Filtered Whole Milk
- 2 tablespoon Unsweetened Plain Yogurt
- 1 teaspoon Liquid Stevia or to taste, optional
- 1 teaspoon Vanilla Extract optional
For Lemon Yogurt
- 3 tablespoon Lemon Curd or to taste
For Blueberry Yogurt
- 1 cup Blueberries fresh or frozen
- 1 tablespoon Lemon Juice
- Liquid Stevia to taste, optional
For Coconut Yogurt:
- 3 tablespoon Coconut Curd or to taste
For Pumpkin Yogurt
- 1 cup Pumpkin Puree
- 1 teaspoon Pumpkin Pie Spice
- 3 tablespoon Sugar Free Maple Syrup or to taste
- 2 tablespoon Cream Cheese
Instructions
- Combine the milk and plain yogurt in the liner of an instant pot. Whisk to combine.
- Cover the instant pot with the standard lid or a glass lid. Since yogurt isn't made under pressure, you don't have to seal the instant pot and the lid doesn't need to be airtight.
- Press the "Yogurt" button. Your instant pot should default to 8:00, but if not use the + or - button to set the time to 8:00
- When the 8 hour incubation time is up, remove the inner liner from the instant pot, cover with plastic wrap and refrigerate for 8 hours.
- After the 8 hour refrigeration time is up, stir the liquid stevia and vanilla into the yogurt. At this point, the yogurt is ready to eat. Transfer the yogurt to a clean container with a tight-fitting lid and store for up to 14 days.
For the Lemon Yogurt:
- Place 3 tablespoons of prepared lemon curd in the bottom of a bowl or dish. Top with 1 cup of the prepared yogurt.
For the Blueberry Yogurt:
- Combine the blueberries, lemon juice, and liquid stevia (if using) in a small saucepan. Heat over medium heat, stirring frequently until the berries have softened and released their juices. If desired, mash or puree this mixture.
- Place 2 tablespoons of the prepared blueberry sauce in the bottom of a bowl or dish. Top with 1 cup of prepared yogurt.
For Coconut Yogurt
- Place 3 tablespoons of prepared Coconut curd in the bottom of a bowl or dish. Top with 1 cup of the prepared yogurt.
For Pumpkin Yogurt
- Combine the pumpkin puree, pumpkin pie spice, maple syrup, and cream cheese in a microwave-safe bowl.
- Heat in the microwave for 30-second intervals, stirring after each interval until the cream cheese has melted and the mixture is smooth and uniform.
- Allow the pumpkin mixture to cool, then place 3 tablespoons into the bottom of a bowl or dish and top with 1 cup of the yogurt.
Notes
Be sure to read the entire post for tips, tricks, and help troubleshooting.
The nutrition information listed here is only an estimate and is simply provided as a courtesy. It nor any other information within this post should constitute medical or nutritional advice. Be sure to read all packaging and ingredient labels for potential allergens. Optional ingredients are not included unless otherwise specified.


Be says
This might seem like a "duh" question, but if I don't have the YOGURT button on my InsatPot, do I just set it for 8:00?
Sabra says
That’s actually a great question! Since yogurt needs to be kept at a low temp, using the manual button on your IP or other pressure cooker would kill the bacteria preventing the fermentation process. If you are making this recipe in an IP without a yogurt button I suggest following the instructions in THIS recipe. Hope that helps!
BE says
Great!! Thanks you!!
Kendra Langlinais says
Tastes amazing but is not at all thick -- I can pour it out (into my mouth, while making nom nom nom sounds). Followed the directions exactly! Any ideas??
Sabra says
Sorry, it didn't thicken up for you. It may be related to the bacteria content in the starter (plain yogurt) that you used but it's hard to tell. You can make it thicker by straining it if you wish 🙂 Just Line a colander with several layers of cheesecloth or even a couple of coffee filters and then fill it with the yogurt. Set the colander over a bowl in the fridge. The excess liquid will filter through the colander. You can allow it to strain until it reaches the right consistency. Here is an article on how to strain yogurt https://www.theyummylife.com/make_your_own_greek_yogurt Hope that helps!
Neena says
Is there any ready-made Keto lemon or coconut curd in the market/online that you tried and recommend?
Amber Clark says
This was my first attempt at making yogurt in the instant pot and using low carb dairy. My yogurt was thin and curdled which I was able to blend smooth and drink. Although it had a pleasant taste, I would like to achieve the ultra creamy consistency of Noosa. I used Fairlife whole milk and a yogurt culture I have used to make traditional yogurt several times successfully. Any advice?
Theresa says
Can you double this recipe? I’d like to make two batches at once.