
This homemade cheesy garlic bread is the perfect pairing for all of your favorite Italian foods. With only a few minutes of hands-on time, this bread is easy to make and much tastier than any store-bought garlic bread!

This Mom's Menu is a participant in the Amazon Services LLC Associates Program, an affiliate advertising program designed to provide a means for sites to earn advertising fees by advertising and linking to amazon.com. This post may be sponsored or contain affiliate links but all opinions are my own. I may earn money from purchases made through the links shared here (at no additional cost to you)
This delicious bread was inspired by the TikTok famous crack bread with just a few tweaks to make it even more irresponsible. It pairs well with a wide variety of foods, but I suggest starting with Homemade Marinara and meatballs, Low Carb Chicken Pesto Alfredo, or Chicken Alfredo Casserole.
Jump to:
Ingredients
This recipe has all the usual suspects of any good garlic bread. It is important for this recipe that you stick with fresh garlic and parsley. You will not get the same result if you use an alternative.

- Fresh garlic
- Fresh Italian parsley
- Olive Oil
- French Bread
- Butter
- Salt and Pepper
- Mozzarella Cheese
- Parmesan Cheese
See the recipe card for quantities and read the variations and substitutions sections for alternative ingredients.
Before you get started ...
To make the preparation a bit more streamlined (aka faster and easier) do yourself a huge favor and prep the following things:
- Gather the necessary equipment and ingredients
- Rinse and dry the parsley if you haven't already done so
- Set the butter out to soften
- Shred the cheeses if you didn't buy pre-shredded
- Preheat the over to 400 degrees Fahrenheit or 205 degrees celsius
Instructions
This cheesy garlic bread is so easy to make that you will wonder why you ever bought the frozen, premade stuff in the first place.
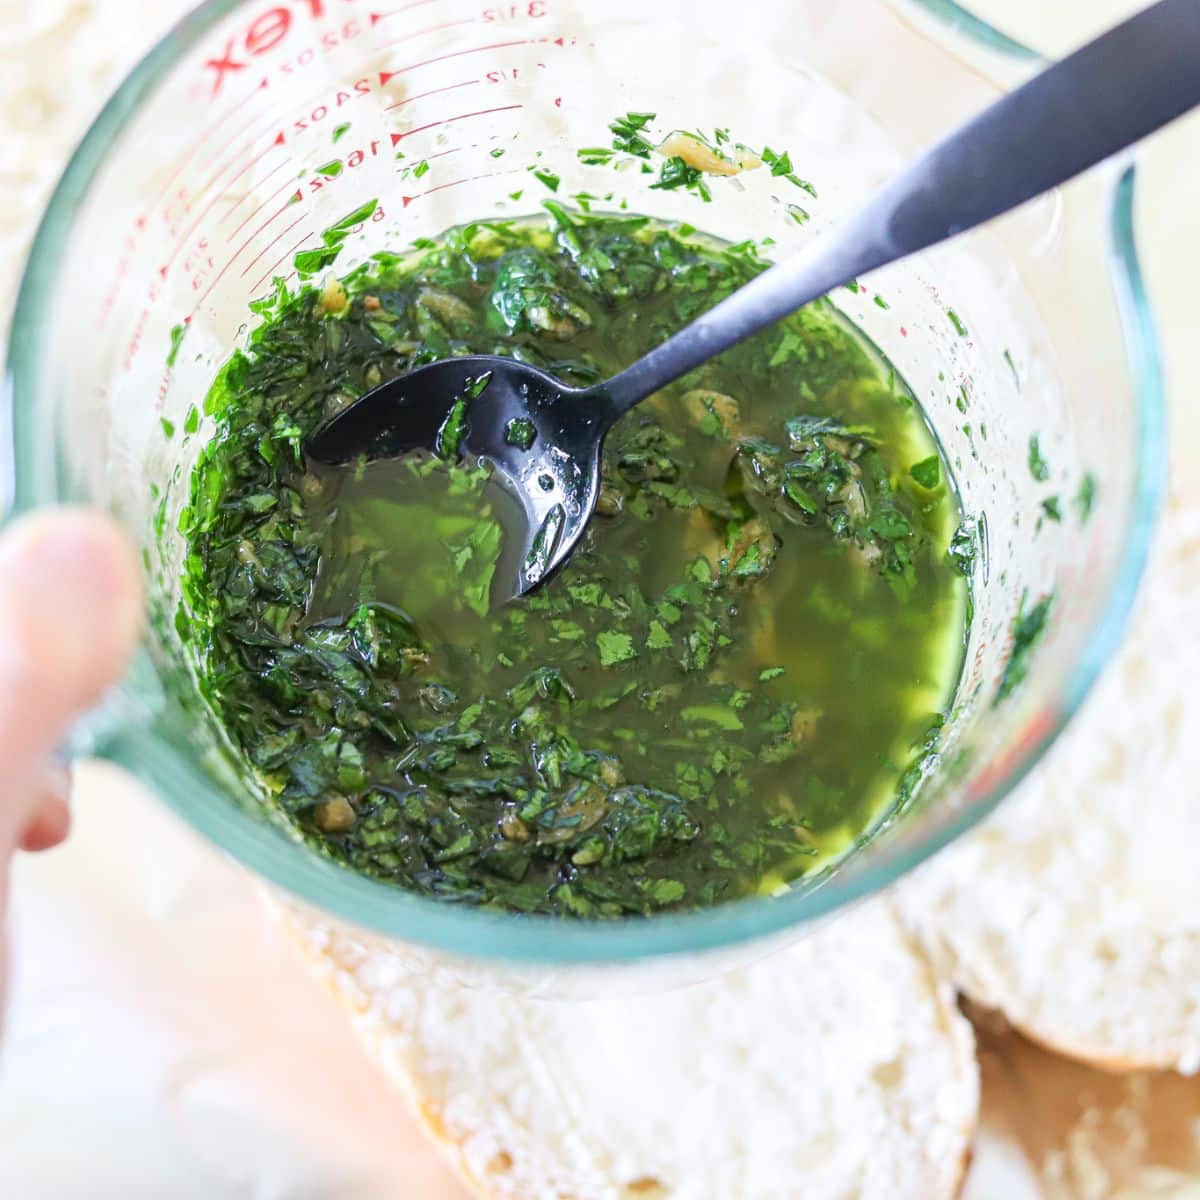
Start out by finely mincing the parsley and garlic. Then combine them with the olive oil in a small bowl and set it aside.
Hint: You can complete this step up to 5 days ahead of time and store it in the fridge until you are ready to use. The longer it all sits together, the more flavorful it will be.

Next, slice the bread in half lengthwise. Place the bread, with the sliced side up, on large pieces of aluminum foil. Coat the sliced side of the bread with the softened butter and season with salt and pepper.

Then spread the parsley, garlic, and olive oil mixture over the bread. Ensure that the bread is covered from edge to edge

Place the two halves of bread back together and wrap the loaf in the aluminum foil. Bake in the preheated oven for 10 minutes.

Remove the bread from the oven, unwrap the foil, and open the halves of the bread. Sprinkle the tops of both halves of bread with the shredded mozzarella and parmesan cheeses. Leave the bread open and return it to the oven for an additional 10 minutes.

Allow the bread to cool for a few minutes, then slice it into 14 even slices. Enjoy immediately!
Variations and Substitutions
This bread can be easily customized or altered to change up the flavors. Here are some of my favorite alternatives:
- Make it Vegan - Swap the butter and cheese for vegan versions.
- Make it a french Bread Pizza - add your favorite pizza toppings along with the cheese in step 5, then serve it with your favorite marinara sauce for dipping.
- No Cheese - If you want to make this bread a bit lighter or just don't like cheese, you can simply leave it off entirely and reduce the second baking time to 5 minutes. This is a great option for pairing with seafood!
- Use pesto - Swap the garlic, parsley, and olive oil mixture for pesto to change up the flavor!
See my homemade pecan pesto recipe!
Equipment
Here is a list of the equipment and tools that you will need to make this garlic bread:
- A knife and cutting board for chopping the garlic and parsley
- Measuring cups and spoons
- A small mixing bowl
- Aluminum foil
- A bread knife
If you prefer, you can use a food processor to chop the parsley and garlic but I honestly find it to be a little too much hassle and prefer to chop them by hand.
Tip: Use a mezzaluna (affiliate) or pizza cutter to slice the cooked bread easily!
Storage
Leftover bread can be stored in a sealed container or wrapped in foil in the fridge for about 5 days. You can also freeze it (before or after baking) for up to 6 months! I suggest reheating the bread in the oven at 350 degrees Fahrenheit for 4 to 8 minutes or until it's hot.
Freezing loaves for later
In fact, I usually make up several loaves at once and freeze some for later. To do this, just follow the recipe card up to step 5. After you add the shredded cheese, wrap the bread in foil and then in clingwrap to prevent freezer burn. Freeze the prepared loaves for up to 6 months.
To cook the prepared loaves simply remove the foil and cling wrap and bake them from frozen, at 400 degrees for about 15 minutes or until the bread is heated through and the cheese is melted and slightly browned.
FAQs
Yes, you definitely can! Just follow the recipe card up to step 5 (topping it with shredded cheese). Allow the bread to fully cool, then wrap it in a layer of foil and then in a layer of clingwrap to prevent freezer burn. Freeze the prepared loaves for up to 6 months.
To cook the prepared loaves simply remove the foil and cling wrap and bake them from frozen, at 400 degrees for about 15 minutes or until the bread is heated through and the cheese is melted and slightly browned
You can easily make this bread without cheese by simply omitting it from the recipe. Follow the cooking instructions as written simply reducing the second baking time to 5 minutes.
Top tips:
- You can complete step 1 up to 5 days in advance and store it in the fridge until you are ready to use it. The longer it sits, the more flavorful it will be!
- Use a mezzaluna (affiliate) or pizza wheel to easily slice the cooked bread!
📖 Recipe

Homemade Cheesy Garlic Bread
Equipment
- Knife and Cutting Board
- Measuring Cups and Spoons
- Small mixing bowl
- Bread Knife
Ingredients
- 5 cloves Garlic
- ½ cup Italian Parsley
- ¼ cup Olive Oil
- 1 loaf French Bread about 14oz
- 4 tablespoon Butter softened
- Salt and Pepper to taste
- 1 cup Mozzarella Cheese shredded
- ½ cup Parmesan Cheese shredded
Instructions
- Preheat the oven to 400° F. Finely mince the garlic and parsley. In a small bowl, combine the chopped parsley and garlic with the olive oil. Set aside.5 cloves Garlic, ½ cup Italian Parsley, ¼ cup Olive Oil
- Slice the French bread in half lengthwise. Place the bread, with the sliced side up, on large pieces of aluminum foil. Coat the sliced side of the bread with the softened butter. Season with salt and pepper.1 loaf French Bread, 4 tablespoon Butter, Salt and Pepper
- Spread the parsley, garlic, and olive oil mixture over the bread. Ensure that the bread is covered from edge to edge.
- Place the two halves of bread back together and wrap the loaf in the aluminum foil. Bake in the preheated oven for 10 minutes.
- Remove the bread from the oven, unwrap the foil, and open the halves of the bread. Sprinkle the tops of both halves of bread with the shredded mozzarella and parmesan cheeses.1 cup Mozzarella Cheese, ½ cup Parmesan Cheese
- Leave the bread open and return it to the oven for an additional 10 minutes or until the cheeses are melted and the edges are golden brown.
- Allow the bread to cool for a few minutes, then slice it into 14 even slices. Enjoy immediately!
Be sure to read the entire post for tips, tricks, and help troubleshooting.
The nutrition information listed here is only an estimate and is simply provided as a courtesy. It nor any other information within this post should constitute medical or nutritional advice. Be sure to read all packaging and ingredient labels for potential allergens. Optional ingredients are not included unless otherwise specified.
Nutrition
Pin It


Comments
No Comments